
Connecting speaker wire involves identifying positive and negative wires, using banana plugs or direct connections, and ensuring proper maintenance. Understanding myths and different connectors enhances sound quality and system longevity.
Connecting speaker wire is essential whether you’re setting up a new sound system or maintaining an existing one. This guide will take you through every step, ensuring you understand how to do it correctly and safely.
From identifying wire polarity to making various connections, everything is explained in simple, straightforward language.
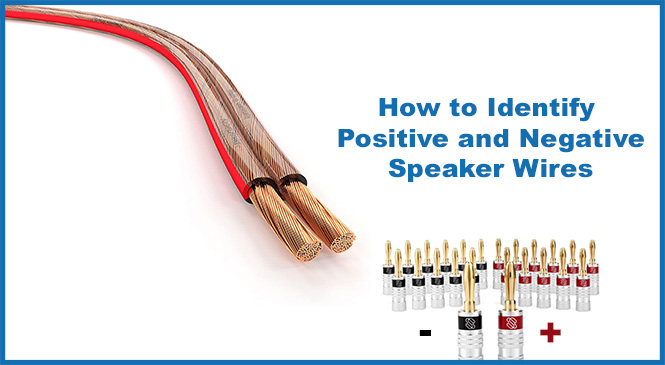
Knowing which wire is positive and which is negative is crucial for proper speaker function. Here’s how to identify them:
- Positive Wire (+): Often marked with a red stripe, a “+” symbol, or some other identifier like text or a textured surface.
- Negative Wire (-): Usually plain or marked with a black stripe, a “-” symbol, or no marking at all.
It’s essential to connect the positive wire to the positive terminal on your speaker and the negative wire to the negative terminal. If these are mixed up, the speakers will be out of phase, which can affect sound quality, making it less clear and reducing bass.
If your speaker wires aren’t clearly marked, you can still figure out which is which. Here are some methods:
- Visual Check: Look for any markings, stripes, or texture differences on the wire. Sometimes, one wire might have a subtle color difference.
- Multimeter Test: Use a multimeter set to continuity mode. Touch one probe to a wire end and the other to the corresponding terminal on the speaker or amplifier. A positive reading indicates the wire is connected correctly to the positive terminal.
Banana plugs make it easier to connect speaker wires to your equipment. They provide a strong and secure connection that’s easy to plug and unplug. Here’s how you can connect your wires to banana plugs:
- Step 1: Strip about ½ inch of insulation from the wire ends. This exposes the copper strands.
- Step 2: Twist the copper strands tightly to prevent them from fraying.
- Step 3: Insert the twisted wire into the small hole in the banana plug.
- Step 4: Tighten the set screw on the banana plug to hold the wire in place.
- Step 5: Plug the banana plug into the speaker or receiver terminal.
- Step 1: Strip ½ inch of insulation from the wire ends.
- Step 2: Insert the bare wire into the side hole of the banana plug.
- Step 3: Tighten the binding post on the banana plug to secure the wire.
- Step 4: Insert the banana plug into the corresponding terminal on your speaker or receiver.
Sometimes you need to connect two pieces of speaker wire together, whether to extend the length or repair a damaged section. Here’s how you can do it:
- Twist and Tape Method:
- Strip the ends of both wires.
- Twist the bare copper strands together.
- Secure the connection with electrical tape to prevent shorts.
- Using a Wire Nut:
- Strip the ends of both wires.
- Twist the wires together, and then screw on a wire nut to hold them securely.
- This is a safe and easy method that provides a solid connection.
- Soldering:
- Strip the ends and twist them together.
- Solder the twisted wires for a permanent and robust connection.
- Cover the soldered connection with heat shrink tubing or electrical tape.
Also Read: One Speaker Is Louder Than The Other – Common Causes and Fixes!
Proper maintenance of speaker wires ensures they perform well over time. Here’s what you can do:
- Regular Inspections: Periodically check your speaker wires for any signs of wear, fraying, or loose connections. Fix any issues you find to avoid performance problems.
- Keep Wires Dry: Moisture can cause corrosion in speaker wires, leading to poor sound quality or even failure. Ensure wires are kept in dry environments.
- Avoid Sharp Bends: Sharp bends or kinks in the wire can weaken the copper strands inside, leading to breaks or poor performance. Keep wires smooth and untangled.
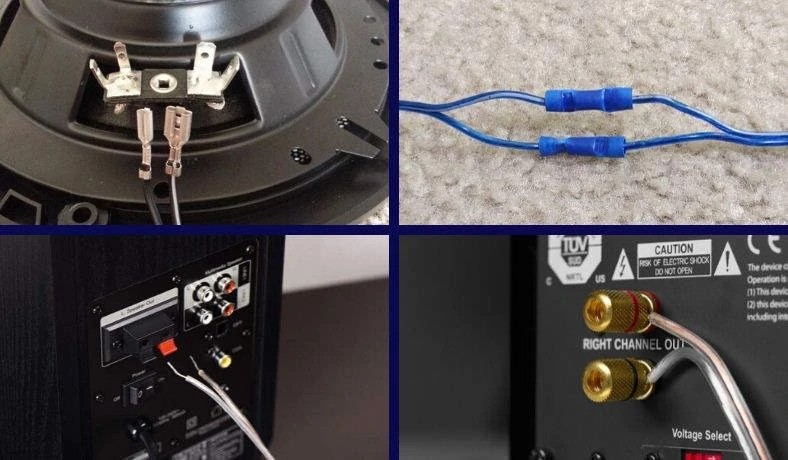
Whether you’re setting up car speakers or a home audio system, connecting speaker wire is similar:
- Strip the Wire: Use a wire stripper to remove about ½ inch of insulation from each end of the wire, exposing the copper strands.
- Connect to Terminals:
- For car speakers, you might crimp or solder the wire to the speaker terminals.
- For home speakers, you can use banana plugs, spade connectors, or simply connect the bare wire to the speaker terminals.
- Secure the Connection: Ensure that the wire is firmly connected to prevent it from coming loose. A secure connection ensures good sound quality.
When connecting speaker wires to terminals, you can either solder or crimp them. Here’s a breakdown of both methods:
- Soldering:
- Advantages: Provides a strong, permanent connection that’s less likely to come loose over time. Ideal for high-vibration environments, like cars.
- Disadvantages: Requires a soldering iron and some skill. It’s also more time-consuming than crimping.
- Crimping:
- Advantages: Quick and easy, requiring only crimp connectors and a crimping tool. It’s a reliable method for most home audio setups.
- Disadvantages: If not done correctly, crimped connections can become loose over time, especially in environments with vibration or movement.
- Step 1: Strip the insulation from the speaker wire ends.
- Step 2: Crimp or solder the wire to the speaker terminals, ensuring a tight connection.
- Step 3: Connect the other end of the wire to the amplifier or head unit.
- Step 1: Strip the wire ends to expose the copper.
- Step 2: Connect the wire to the speaker terminals using banana plugs, spade connectors, or directly to the binding posts.
- Step 3: Secure the other end to the receiver or amplifier.
Also Read: What Is The Sceptry Monitor Speaker Name – Complete Guide!
There are several myths about speaker wiring that can confuse beginners. Let’s clear up a few:
Many people believe that splicing speaker wire reduces sound quality. However, if the connection is made correctly with proper insulation, the impact on sound quality is minimal.
While it’s true that in a perfect world, wires should be the same length, slight differences won’t make a noticeable difference in sound quality for most home setups.
Thicker wires are beneficial for long runs or high-power systems because they reduce resistance. However, for shorter runs in a typical home setup, standard gauge wires work just fine.
The skin effect, where high-frequency signals travel more on the surface of the wire, is not a concern for most audio applications. It’s more of a factor in higher frequency RF signals, not audio frequencies.
Some believe that speaker wires need a break-in period to perform their best. This is a myth—wires don’t change with time. They work as well on day one as they do years later, provided they’re well maintained.
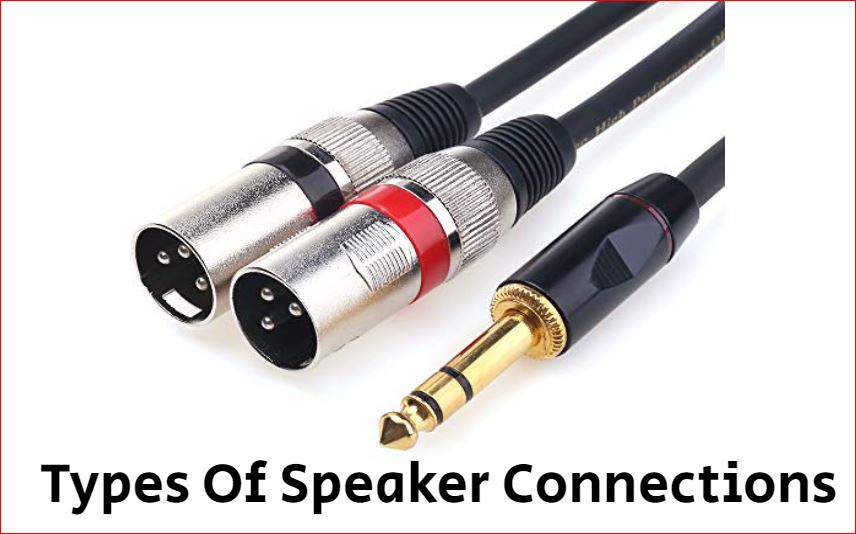
There are several types of connectors you might use to connect speaker wires:
- Banana Plugs: These are easy to use and provide a reliable connection. They’re great for frequent connecting and disconnecting.
- Spade Connectors: These provide a secure and solid connection, often used in car audio where vibrations are a concern.
- Pin Connectors: Ideal for older equipment with spring-clip terminals, pin connectors are simple and effective.
- Bare Wire: This is the most straightforward method. You simply insert the stripped wire directly into the terminal. It’s effective, though not as convenient as using connectors.
Connecting speaker wire to a binding post involves stripping about half an inch of insulation from the wire’s end, twisting the exposed strands for a neat connection, loosening the binding post cap, inserting the wire into the hole or wrapping it around the post, and securely tightening the cap.
Connecting your TV to a speaker system often requires an audio receiver. Here’s how to do it:
- Connect the Speaker Wires: Attach the speaker wires to the speakers and then to the corresponding terminals on the audio receiver.
- Connect the TV to the Receiver: Use an HDMI cable, optical cable, or RCA cables to connect your TV to the audio receiver. This allows the sound from the TV to be output through the connected speakers.
- Configure the TV’s Audio Settings: Go into the TV’s settings menu and choose the correct audio output option (often labeled as “External Speakers” or “Receiver”) to ensure the sound is routed through the receiver and not the TV’s built-in speakers.
Positive wires often have a red stripe or “+” symbol, while negative wires may have a black stripe or be unmarked.
You can use twist-and-tape, wire nuts, or soldering methods to securely connect two pieces of speaker wire.
While ideal, slight differences in wire length won’t significantly impact sound quality in most home setups.
Soldering provides a stronger, more permanent connection, while crimping is quicker and easier for most home audio setups.
Connect speaker wires to an audio receiver, then link the receiver to the TV using HDMI, optical, or RCA cables. Adjust TV settings for external speakers.
Connecting speaker wire is a straightforward process that ensures your sound system functions at its best. Whether using banana plugs, soldering, or crimping, it’s essential to understand the basics of wire polarity, connection methods, and maintenance. Clearing up common myths about speaker wiring can help you make informed decisions, leading to better audio performance and a longer-lasting setup. Properly connected and maintained wires result in superior sound quality.